
How to Choose the Best Carburetor Cleaner?
Choosing the best Carburetor Cleaner is not simply about selecting the strongest formula. The right product depends on deposits, engine materials, application method, and cleaning conditions. A cleaner that removes hardened varnish may damage sensitive rubber, painted surfaces, or certain plastics. Strength matters, but compatibility matters more.
In practical maintenance, I have found that a clogged carburetor often shows several symptoms. The engine may hesitate, idle unevenly, or struggle during starting. However, these signs can also indicate ignition or fuel delivery problems. Do not blame the carburetor too quickly. Careful diagnosis prevents wasted cleaner and unnecessary repairs. Always work on a cool engine, use adequate ventilation, and follow the product label closely. Small details matter, including nozzle control and protecting nearby surfaces.
A reliable buying decision should consider cleaning power, residue, drying time, material safety, and user reviews. Professional guidance from manufacturers and experienced technicians can help confirm these points. Avoid choosing only by price or bold advertising claims. The “strongest” product is not always the best product. Sometimes, a milder cleaner delivers better control and fewer risks. I have also learned that one application may not remove every deposit. Patience is useful. Inspect the components, clean gradually, and replace damaged parts when necessary. This approach creates a more dependable result and supports safer, longer-lasting engine maintenance.
What Carburetor Cleaner Does and Why It Matters
How to Choose the Best Carburetor Cleaner?
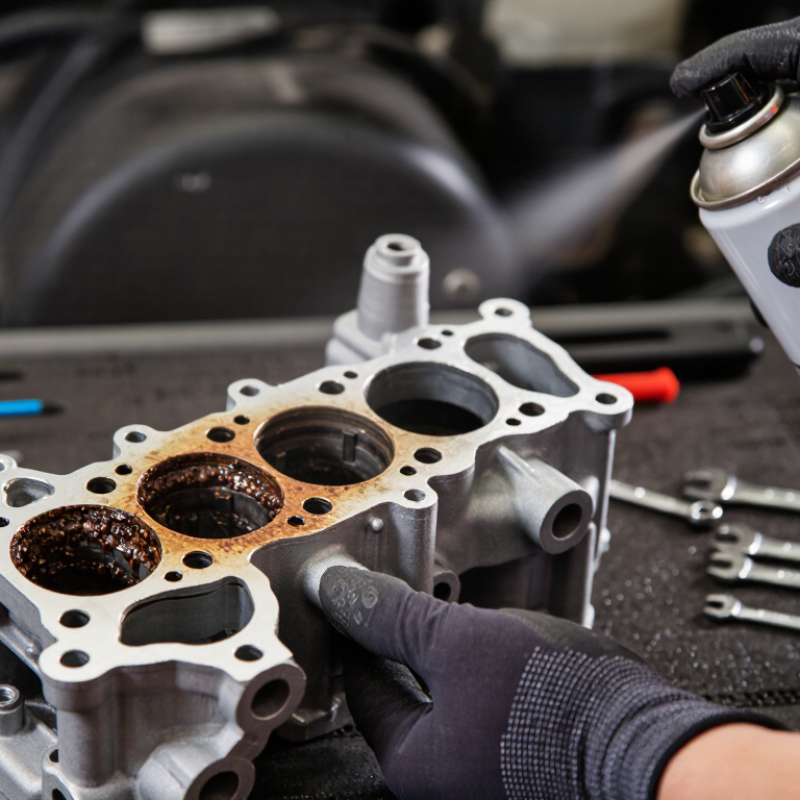
A carburetor cleaner removes varnish, fuel residue, and carbon from narrow passages. These deposits can restrict fuel flow and weaken engine response. In my repair experience, a sticky throttle plate often feels like an ignition problem. It was not.
The cleaner works by softening hardened deposits on metal surfaces. A fast-evaporating formula can reduce leftover moisture and residue. However, stronger solvents may damage rubber seals, painted parts, or certain plastics. Check the product’s safety sheet and compatibility instructions before spraying. That small step matters. Use the cleaner in a well-ventilated area, away from heat and sparks. Wear suitable eye and hand protection, because dissolved grime can splash unexpectedly. Never assume every cleaner suits every carburetor.
Choosing the best option depends on the deposit and the component material. For light surface dirt, a moderate solvent may be sufficient. Heavy varnish may need repeated applications rather than one aggressive treatment. I once used too much cleaner and overlooked a brittle gasket. The carburetor looked clean, but it leaked afterward. That mistake changed my process. I now remove sensitive parts when possible and apply cleaner to a cloth or brush first. A precise spray tube also helps reach small passages without flooding nearby components. Cleaner cannot repair worn jets, damaged seals, or incorrect adjustments. It only restores cleanliness, which is sometimes less than the engine needs.
| Cleaner Type | Common Active Chemistry | Best For | Cleaning Performance | Residue After Evaporation | Material Compatibility | Key Safety Considerations | Typical Choice |
|---|---|---|---|---|---|---|---|
| Solvent-Based Aerosol | Fast-evaporating organic solvents, often including acetone, aromatic solvents, ketones, or alcohols | Varnish, gum, fuel deposits, grease, and dirt on removable carburetor parts | High | Usually low, provided the cleaner is allowed to evaporate completely | Generally suitable for bare metal; may soften some plastics, rubber, paint, and synthetic diaphragms | Highly flammable; use only with good ventilation and away from ignition sources | General-purpose carburetor maintenance and heavily contaminated metal components |
| Chlorinated Solvent Cleaner | Chlorinated degreasing solvents | Heavy grease and stubborn deposits on compatible metal components | Very high | Low, but the solvent must fully evaporate before reassembly | Best limited to approved metal surfaces; can damage plastics, rubber, coatings, and painted parts | Use strict ventilation and follow the safety data sheet; never use near heat or welding operations | Industrial-style metal-part cleaning when the product label specifically permits the application |
| Non-Chlorinated Solvent Cleaner | Fast-evaporating hydrocarbons, ketones, alcohols, or similar solvent blends | Routine deposit removal where a chlorinated formula is not desired | High | Usually low | Suitable for many metal surfaces; compatibility with seals, plastics, and painted surfaces varies by formula | Flammable vapors may accumulate in enclosed areas; keep away from sparks and flames | A practical option for most workshop applications when material compatibility is confirmed |
| Aqueous or Water-Based Cleaner | Water, detergents, alkaline builders, and corrosion-control additives | Light oil, dust, and water-soluble contamination on parts that can be rinsed and dried | Moderate | Very low, but water can remain in passages if drying is incomplete | Often gentler on selected plastics and coatings, but alkaline formulas may attack soft metals or sensitive finishes | Prevent corrosion by rinsing when required and drying all passages thoroughly | Lower-vapor cleaning where the component manufacturer allows water-based products |
| Throttle-Body and Intake Cleaner | Solvent blends designed to remove fuel residue and carbon from air-intake components | Throttle plates, intake surfaces, and air passages; sometimes suitable for carburetor exteriors | High | Usually low | May be unsuitable for certain rubber seals, sensors, diaphragms, or painted surfaces | Do not assume it is safe for every carburetor component; check the label before direct application | Cleaning intake-related parts when a dedicated carburetor cleaner is unavailable or unsuitable |
| Deposit-Softening Cleaner | Slower-acting solvents and detergents intended to loosen hardened varnish and gum | Old fuel residue and deposits that require soaking or repeated treatment | High after adequate dwell time | Varies; parts may require wiping or rinsing after treatment | Compatibility depends strongly on soak time and formulation; test plastics, rubber, and coatings first | Do not soak sensitive components unless the product instructions explicitly allow it | Restoration work on removable parts with aged or baked-on fuel deposits |
| Selection rule: Choose a fast-evaporating solvent for heavy metal-part deposits, a milder formula for routine maintenance, and a water-based product only when thorough rinsing and drying are practical. Always verify the label and safety data sheet for flammability, ventilation, personal protective equipment, and compatibility with plastics, rubber, seals, coatings, and soft metals. | |||||||

Certified Quality System

 Find Your Solutions ▶
NORTH EASTON MACHINE • 218 Elm Street • North Easton, MA 02356 • 508-238-6219